Mastering the Art of Sautéing: Tips for Perfectly Cooked Vegetables and Proteins
Sautéing: It sounds fancy, like something only chefs in white coats do. But the truth is, it’s one of the simplest and most versatile cooking techniques you can master. In its most basic form, sautéing is all about quickly cooking food over medium-high heat in a small amount of fat. The result? Beautifully browned, tender-crisp vegetables and succulent proteins bursting with flavor.
If you’ve ever been frustrated by soggy veggies or rubbery chicken, this guide is for you. We’re going to delve deep into the science of sautéing, share essential tips, and troubleshoot common mistakes. Whether you’re a kitchen newbie or a seasoned home cook, you’ll be flipping and searing your way to culinary confidence in no time.
By the end of this post, you’ll not only know how to sauté, but you’ll also understand why certain techniques work. So, grab your spatula and let’s get started on your journey to mastering the art of sautéing.

Mastering the Art of Sautéing
The Science of Sautéing – Mastering the Art of Sautéing
Sautéing may seem simple, but there’s a fascinating world of science happening in your pan. Understanding this science not only satisfies your inner nerd but also helps you make smarter cooking decisions.
The Maillard Reaction: Where Flavor is Born – Mastering the Art of Sautéing
Ever wondered why sautéed food tastes so much better than boiled or steamed food? A chemical process known as the Maillard reaction holds the key to the answer. When proteins and sugars in food are exposed to high heat, they undergo a series of transformations, creating hundreds of new flavor compounds. This is what gives sautéed food its characteristic savory, complex taste and that gorgeous golden-brown color.
The Role of Heat: It’s All About Control – Mastering the Art of Sautéing
Heat is your primary tool in sautéing. High heat is essential for the initial sear, which is where the Maillard reaction takes place. Searing creates a flavorful crust on the surface of your food while sealing in moisture. But, too much heat and your food will burn. That’s why it’s important to adjust the heat throughout the cooking process.
The Importance of Dry Ingredients: A Dry Pan is a Happy Pan – Mastering the Art of Sautéing
Water is the enemy of the Maillard reaction. If your food is wet, it will steam instead of sear. That’s why it’s crucial to pat your ingredients dry before adding them to the pan.
Fond: The Secret to Flavorful Pan Sauces – Mastering the Art of Sautéing
As you sauté, bits of food will stick to the bottom of the pan. This is called fond, and it’s pure flavor gold. Don’t toss it out! By deglazing the pan with a little liquid (wine, broth, or even water), you can loosen the fond and create a delicious base for a pan sauce.
Understanding these key concepts will help you troubleshoot any issues you encounter while sautéing. Remember, it’s not just about following a recipe; it’s about understanding the how and why.
Essential Tools for Sautéing – Mastering the Art of Sautéing
Having the right tools for the job can make all the difference in your sautéing endeavors. While you don’t need a fancy kitchen full of gadgets, there are a few essentials that will set you up for success.
The Right Pan: Your Sautéing Workhorse
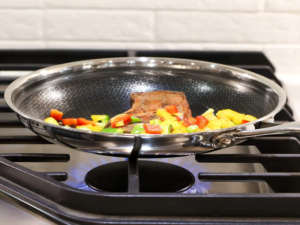
- Stainless Steel: A good quality stainless steel pan with a thick bottom is a versatile choice. It heats evenly, won’t react with acidic ingredients, and can handle high temperatures.
- Cast Iron: Cast iron pans retain heat exceptionally well, making them perfect for searing. They also develop a natural nonstick surface over time. However, they require a bit more care and seasoning.
Which Pan is Right for You?
| Feature | Stainless Steel | Cast Iron |
| Heat Distribution | Excellent | Excellent (once preheated) |
| Reactivity with Acidic Foods | None | Can react with acidic foods if not seasoned |
| Durability | Very durable | Extremely durable |
| Ease of Care | Easy to clean | Requires seasoning and special care |
| Price | Moderate to expensive | Affordable to moderate |
The Perfect Spatula: Your Sautéing Sidekick
- Fish Spatula: This thin, flexible spatula is ideal for delicate foods like fish, eggs, and pancakes. It slides easily under food without breaking it.
- Silicone Spatula: Heat-resistant and nonstick, silicone spatulas are great for all types of sautéing. They won’t scratch your pans and can handle high temperatures.
Reliable Tongs: The Flipping Masters
A good pair of tongs is essential for flipping and turning proteins. Look for tongs with a comfortable grip and scalloped edges that can securely hold food.
Instant-Read Thermometer: Your Key to Perfectly Cooked Protein – Mastering the Art of Sautéing
Don’t guess when your protein is done. An instant-read thermometer takes the guesswork out of cooking, ensuring your chicken is juicy, your steak is cooked to your liking, and your fish is flaky and tender.
Splatter Guard: Keep Your Kitchen Clean
Sautéing can be a messy business. A splatter guard placed over your pan will help contain the oil and prevent it from splattering all over your stovetop.
With the right tools in your arsenal, you’ll be well on your way to sautéing like a pro!
Prepping for Success: Mise en Place for Sautéing
The French culinary term “mise en place” (pronounced meez ahn plahs) translates to “everything in its place.” In the kitchen, it means having all your ingredients prepped and ready to go before you even turn on the stove. While this may seem like extra work, it’s actually a time-saver and stress-reducer. When you’re sautéing, things move quickly, and having everything prepped allows you to focus on the cooking process without scrambling for ingredients.
Properly Sized Cuts: The Key to Even Cooking
The goal of sautéing is to cook your food quickly and evenly. That’s why it’s important to cut your ingredients into uniform pieces. If some pieces are larger than others, they’ll cook at different rates, leading to some bits being undercooked while others are overdone.
- Vegetables: Aim for bite-sized pieces, usually about ½ inch to 1 inch.
- Proteins: Cut into evenly sized pieces, about 1 inch thick for chicken breasts or fish fillets.
Drying Ingredients: Moisture is the Enemy
Remember, water hinders the Maillard reaction and prevents your food from browning properly. Before you start sautéing, be sure to thoroughly pat your vegetables and proteins dry with paper towels. If you’re working with leafy greens like spinach, use a salad spinner to remove excess moisture.
Preheating the Pan: The Sizzle is Essential
A hot pan is crucial for a successful sear. Place your pan over medium-high heat and let it heat up for a few minutes. You can test the temperature by flicking a few drops of water into the pan. If the water sizzles and evaporates immediately, your pan is ready.
Choosing the Right Fat: Oils and Their Smoke Points
The type of fat you use for sautéing matters. Different fats have different smoke points, which is the temperature at which they begin to break down and smoke. Choose a fat with a high smoke point for sautéing to prevent your food from tasting burnt.
Common Cooking Fats and Their Smoke Points:
| Fat | Smoke Point (°F) | Notes |
| Avocado Oil | 520 | Neutral flavor, high smoke point |
| Refined Coconut Oil | 450 | Subtle coconut flavor, good for high heat |
| Canola Oil | 400 | Neutral flavor, affordable option |
| Extra-Virgin Olive Oil | 325-375 | Robust flavor, best for finishing or lower heat |
| Butter | 350 | Rich flavor, but can burn easily at high heat |
| Ghee (Clarified Butter) | 485 | Rich, nutty flavor, higher smoke point than butter |
By following these prep steps, you’ll set yourself up for a smooth and successful sauté. Remember, a little preparation goes a long way in the kitchen!

Mastering the Art of Sautéing
Mastering the Art of Sautéing Vegetables – Mastering the Art of Sautéing
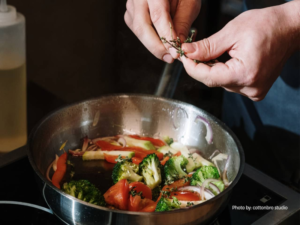
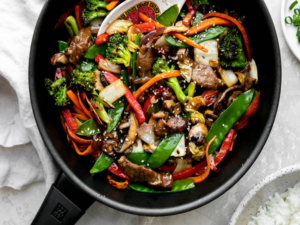
Sautéed vegetables are a culinary chameleon. They can be a simple side dish, a vibrant topping for salads or grain bowls, or the star ingredient in a main course. The key to perfectly sautéed vegetables lies in understanding their unique properties and employing the right techniques.
Step-by-Step Guide to Sautéing Vegetables:
- Heat the Pan and Fat:Place your pan over medium-high heat. Once hot, add your chosen fat. The oil shouldn’t burn, but it should sparkle.
- Add Vegetables:Working in batches if necessary to avoid overcrowding, add your vegetables to the pan. You should hear a sizzle when they hit the pan – that’s the sound of deliciousness in the making!
- Don’t Crowd the Pan:Overcrowding the pan lowers the temperature and causes the vegetables to steam instead of sauté. Cook the veggies one at a time if you have a lot of them.
- Stir or Flip:For smaller vegetables, give them a stir every minute or so to ensure even cooking. For larger pieces, flip them occasionally.
- Season at the Right Time:Salt draws out moisture, so it’s best to season your vegetables towards the end of cooking to prevent them from becoming soggy. Add a pinch of salt and pepper, or get creative with your favorite herbs and spices.
Common Mistakes to Avoid When Sautéing Vegetables:- Mastering the Art of Sautéing
- Overcrowding: Too many vegetables in the pan will steam instead of sauté.
- Adding Ingredients Too Early: If your pan isn’t hot enough, the vegetables will release moisture and become soggy.
- Not Seasoning at the Right Time: Salting too early can draw out moisture and make the vegetables watery.
Sautéing Specific Vegetables: A Quick Guide
Each vegetable has its own unique qualities and cooking time. Here’s a quick guide to sautéing some popular vegetables:
| Vegetable | Ideal Cut | Approximate Cooking Time | Notes |
| Asparagus | 1-inch pieces on a bias | 3-5 minutes | Snap off the tough ends before cutting. |
| Broccoli | Bite-sized florets | 5-7 minutes | Blanch in boiling water for 1 minute before sautéing for a brighter color. |
| Brussels Sprouts | Halved or quartered | 8-10 minutes | If using whole sprouts, score the bottoms to help them cook evenly. |
| Carrots | Thinly sliced or julienned | 5-7 minutes | |
| Mushrooms | Sliced or quartered | 5-7 minutes | Don’t crowd the pan, as mushrooms release a lot of moisture. |
| Onions | Sliced or diced | 5-7 minutes for sliced, 3-5 minutes for diced | Cook until softened and translucent. |
| Peppers | Sliced or diced | 5-7 minutes | Remove seeds and membranes before slicing. |
| Spinach | Whole leaves | 1-2 minutes | Add towards the end of cooking as it wilts quickly. |
| Zucchini | Sliced or diced | 3-5 minutes |
With practice and attention to detail, you’ll soon be turning out perfectly sautéed vegetables that are crisp, tender, and bursting with flavor.
Mastering the Art of Sautéing Proteins – Mastering the Art of Sautéing
Perfectly sautéed proteins are tender, juicy, and full of flavor. Whether you’re cooking a simple chicken breast for a weeknight dinner or a succulent steak for a special occasion, mastering the art of sautéing proteins will elevate your culinary skills.
Step-by-Step Guide to Sautéing Proteins
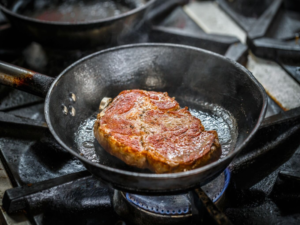
- Sear for Flavor:Start by searing the protein over medium-high heat to create a flavorful crust. This step is crucial for developing those complex flavors and ensuring a juicy interior.
- Lower the Heat:Once the protein is seared on all sides, reduce the heat to medium or medium-low to finish cooking through. For thicker cuts of meat, you can also transfer the pan to a preheated oven to finish cooking.
- Use a Thermometer:The most reliable way to determine doneness is to use an instant-read thermometer. Here are some general guidelines for internal temperatures:
- Chicken: 165°F
- Fish: 145°F or until opaque and flaky
- Steak: Varies depending on desired doneness (rare, medium-rare, medium, etc.)
- Tofu: Cook until golden brown on all sides.
- Rest Before Slicing:After removing the protein from the pan, let it rest for a few minutes. This lets the juices move around, which makes the final dish more soft and delicious.
Common Mistakes to Avoid When Sautéing Proteins:
- Moving the Protein Too Early: Resist the urge to move the protein around in the pan before it has a chance to sear. Wait for a top to form before flipping it.
- Overcooking: Overcooked proteins become tough and dry. Make sure the food is done by using a thermometer.
Sautéing Specific Proteins: A Quick Guide
| Protein | Ideal Cut | Approximate Cooking Time | Notes |
| Chicken Breast | 1-inch thick, pounded to even thickness | 6-8 minutes per side | |
| Chicken Thighs | Boneless, skinless | 5-7 minutes per side | |
| Shrimp | Peeled and deveined | 2-3 minutes per side | Cook until pink and opaque. |
| Scallops | Dry with paper towels before cooking | 2-3 minutes per side | Don’t overcrowd the pan. |
| Steak (New York Strip, Ribeye, etc.) | 1-inch thick | Varies depending on desired doneness | Use a thermometer for accuracy. |
| Tofu | Pressed to remove excess moisture, cut into cubes or slices | 5-7 minutes per side | Cook until golden brown. |
By understanding the basics of sautéing proteins and following these specific tips, you’ll be well on your way to creating restaurant-quality dishes at home.

Mastering the Art of Sautéing
Creating Delicious Pan Sauces – Mastering the Art of Sautéing
A great pan sauce can elevate a simple sauté into a restaurant-worthy dish. These flavorful sauces are made by deglazing the pan with liquid after the protein or vegetables have been cooked. This simple technique unlocks a world of flavor potential.
Deglazing: The Magic of Transforming Fond into Flavor – Mastering the Art of Sautéing
After you’ve removed your perfectly sautéed food from the pan, you’ll notice browned bits stuck to the bottom. This is the fond, and it’s packed with flavor. Deglazing is the process of adding liquid to the hot pan, which helps to loosen and dissolve the fond. This creates a flavorful base for your pan sauce.
Building Flavor: The Art of Pan Sauces
Once you’ve deglazed the pan, you can start building flavor. Here’s how:
- Aromatics:Start by sautéing aromatics like onions, garlic, shallots, or ginger in the remaining fat. This will add another layer of complexity to the sauce.
- Herbs and Spices:Add fresh or dried herbs and spices to complement the flavors of your main dish.
- Liquid:Add your chosen liquid to the pan. This could be wine, broth, vinegar, or even water. The liquid will help to dissolve the fond and create the base of your sauce.
- Reduction:Simmer the sauce until it reduces and thickens slightly. This concentrates the flavors and creates a richer, more luxurious sauce.
- Finishing Touches:Finish your sauce with a pat of butter, a squeeze of lemon juice, or a sprinkle of fresh herbs for a final burst of flavor.
Thickening Agents: Adding Body to Your Sauce
If you want a thicker sauce, you can add a thickening agent like:
- Flour or Cornstarch: Create a slurry by mixing a small amount of flour or cornstarch with cold water. Whisk the slurry into the simmering sauce until it thickens.
- Reduction: Continue simmering the sauce until it reduces and thickens to your desired consistency.
With a little practice, you’ll be creating delicious pan sauces that will impress your family and friends. Remember, the key is to experiment and have fun with different flavor combinations!
Bonus Tips & Tricks for Sautéing Success – Mastering the Art of Sautéing
Beyond the basics, there are a few additional tips and tricks that can take your sautéing skills to the next level:
- Clean Between Batches: If you’re cooking multiple batches of food, quickly wipe out the pan with a paper towel between batches to prevent any burnt bits from affecting the flavor of the next batch.
- Adjust Heat as Needed: Remember, sautéing is all about controlling the heat. Don’t be afraid to adjust the heat up or down as needed to prevent burning or sticking.
- Don’t Be Afraid of the Sizzle: Sautéing should be a lively process. Listen for the sizzle when you add ingredients to the pan – that’s the sound of the Maillard reaction working its magic!
- Taste as You Go: The best way to ensure your food is seasoned properly is to taste it as you cook. Adjust the seasoning as needed to achieve your desired flavor.
- Experiment with Seasonings: Sautéing is a great opportunity to get creative with your seasonings. Try different herbs, spices, and citrus zest to add depth and complexity to your dishes.
Pro Tip: One of the easiest ways to elevate your sautéing game is to invest in high-quality finishing salt, like Maldon sea salt or fleur de sel. A sprinkle of these flaky salts at the end of cooking adds a burst of flavor and a touch of elegance to your dishes.
Remember, practice makes perfect. The more you sauté, the more comfortable you’ll become with the technique and the more confident you’ll be in your ability to create delicious, perfectly cooked dishes.

Mastering the Art of Sautéing
FAQs About Sautéing – Mastering the Art of Sautéing
Let’s tackle some common questions that often come up when people are learning the art of sautéing:
Q: What’s the difference between sautéing and stir-frying? – Mastering the Art of Sautéing
A: While both techniques involve quick cooking over high heat, there are some key differences:
- Pan: Sautéing is typically done in a skillet or frying pan, while stir-frying is done in a wok.
- Amount of Oil: Sautéing uses a small amount of oil, just enough to coat the pan. Stir-frying often uses more oil.
- Technique: Sautéing involves flipping or stirring the food occasionally, while stir-frying requires constant tossing and flipping.
- Ingredients: Sautéing is often used for smaller, more delicate ingredients like vegetables and thin cuts of meat. Stir-frying is better suited for larger pieces of meat and vegetables.
Q: Can I sauté frozen vegetables? – Mastering the Art of Sautéing
A: It’s generally not recommended to sauté frozen vegetables without thawing them first. The excess moisture from the frozen vegetables will create steam and prevent proper browning. Thaw your vegetables completely and pat them dry before sautéing for best results.
Q: What’s the best way to prevent sticking? – Mastering the Art of Sautéing
A: To prevent sticking, make sure your pan is hot enough before adding the oil, and use enough oil to coat the bottom of the pan. Avoid overcrowding the pan, and don’t move the food around too much until it has had a chance to sear. If your food is still sticking, you can try adding a little more oil to the pan.
Q: How do I know when my protein is cooked through? – Mastering the Art of Sautéing
A: The most reliable way to check for doneness is to use an instant-read thermometer. The internal temperature will vary depending on the type of protein and your desired level of doneness. Here’s a quick reference:
| Protein | Safe Internal Temperature (°F) |
| Chicken | 165 |
| Fish | 145 or until opaque and flaky |
| Ground Beef | 160 |
| Steak | Varies depending on desired doneness |
Q: Can I use butter for sautéing? – Mastering the Art of Sautéing
A: While butter adds delicious flavor, it has a low smoke point and can burn easily at high heat. If you want to use butter, consider combining it with a high-smoke-point oil like avocado oil or ghee. Alternatively, use clarified butter, which has a higher smoke point than regular butter.
Conclusion: Your Sautéing Journey Begins! – Mastering the Art of Sautéing
Congratulations! You’ve now embarked on the exciting journey of mastering the art of sautéing. With practice and a dash of creativity, you’ll transform ordinary ingredients into extraordinary dishes that delight the senses.
Remember, sautéing is more than just a cooking method – it’s a culinary adventure. It’s about discovering new flavors, experimenting with different techniques, and sharing the joy of food with others. So, embrace the sizzle, savor the aromas, and most importantly, have fun in the kitchen!
Now that you’ve learned the secrets of sautéing, it’s time to put your knowledge to the test. Don’t be afraid to experiment, try new recipes, and most importantly, share your creations with us! We’d love to hear about your sautéing successes (and even your delicious failures!) in the comments below.
Happy cooking!
